
It was on the brink of digital photgraphy. The industry that supplied us with lots of 35mm film cameras (135 films) came out with a new technology, the „Advanced Photo System„, or short APS. At this time digital photo cameras were still expensive and the picture sizes were really basic, I got an Olympus camera with just 1024×768 pixels. Enough to make photos for web pages, but not enough for high quality photos. So I also got an APS camera.
Fast forward to the present. From all my years of photography I have lots of 35mm slides, some 35mm negatives and also a bunch of APS films that hold memories of the time when my kids were small. So recently I decided to get a better film and slide scanner (I already had one with 6 megapixels) to scan all the old films and slides. Looking at the options it showed that you have 2 options, either a professional scanner which is quite expensiv or a small budget scanner that is more or less just a digital camera designed to make photos of your film and slides. The problem was, that even the budget scanners are expensive, when you look for an option to scan APS films. So I went for one without APS option, having in mind that I have a 3D printer and ideas. I bought an Reflecta x33-Scan. This one comes with a 14 megapixe sensor.
Ideas for an APS adapter
So the basic idea for an APS adapter is that its a copy of the 35mm film adapter, but with just one window for the picture and that window has the size of the APS picture. I decided to give FreeCAD a try this time, even if I would have been faster with openSCAD, but my goal was to get more skills in FreeCAD.
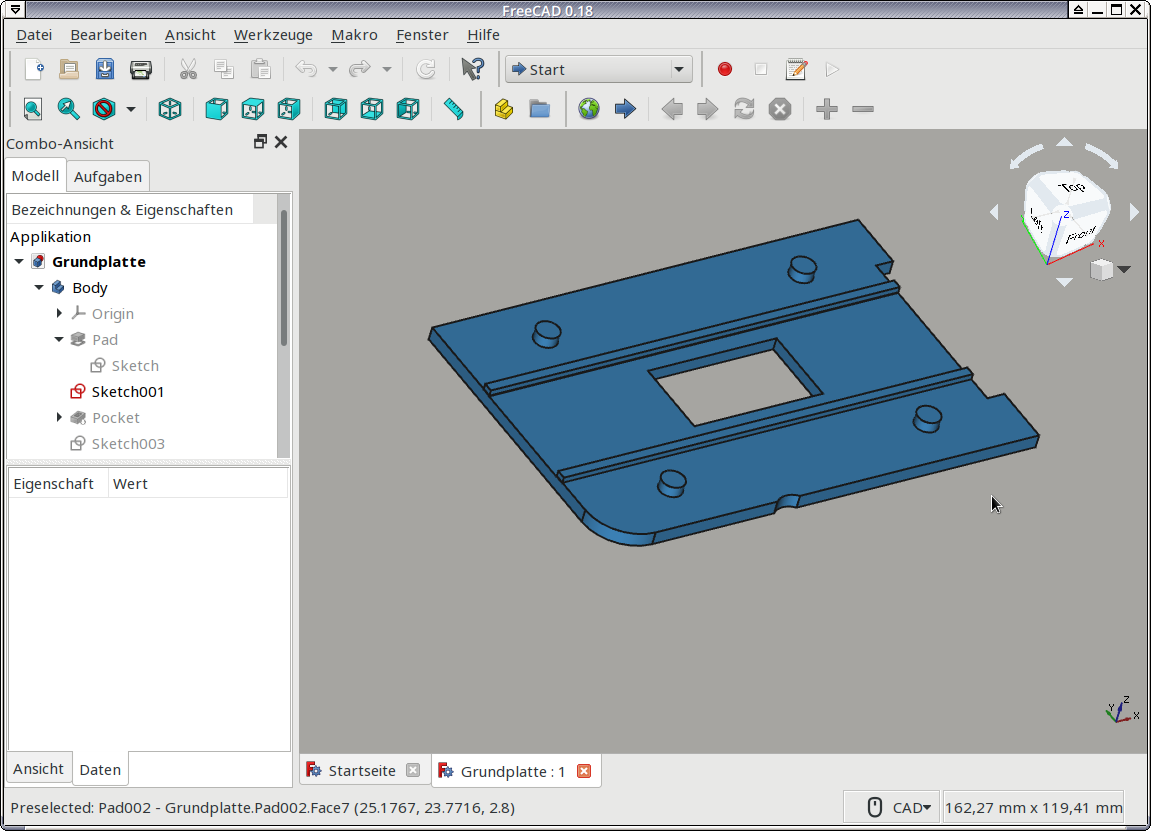
So I constructed a base plate and an top plate that fits together, so that the film can be slided through that adapter. Those 2 pieces are printed in around 90 minutes each, so no big deal. Ok, I had to change the top plate a bit so that they better fit together, but then my adapter was ready for the first run.
First test
The first test was disappointing. When scanning on the 135 film settting the picture was very dark, when changing to other film formats the brigthness of the picture was good, but then I just saw a fragment of it.
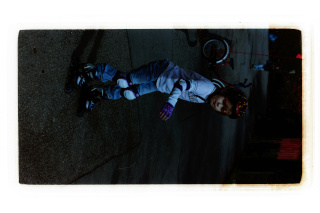
The picture is too dark, you can’t even use photo editing software to enhance it. The white frame around it is my black adaper which turns white on negative scanning.
What happened to my theory of an easy APS scanner? Well, I guess the correct anlysis of this problem is that I printed my adapter with black filament. When using the 135mm setting then some reasonable part of my „picture to scan“ is black and that confuses the brightness automatic of that scanner. So when selecting other film formats, then the area to be used for brightness automatic will be smaller and everything is ok.
In a perfect world there would be a chance that a firmware upgrade is provided by the manufacturer or if the firmware would be open source someone could replace the setting for 110 films (which were the small pocket cameras of the 70’s) with an APS setting that takes care of the correct image area.
But we’re not living in a perfect world. So I needed another solution.
What if we use transparent filament
So the idea that came to my mind was, what would happen if I print the adapter with transparent filament. This won’t block the light from the scanner and maybe the average exposure on the 135mm area is better. Let me give it a try.

The transparent filament is far away from being transparent like glass, but at least it lets light pass through. I put together the pieces and started the next try.

The adapter needs to be inserted from the right side, so that the round corner can push away that pin which later fits in the notch on the fron side. So the adapter is in a fixed position for all scanned pictures.
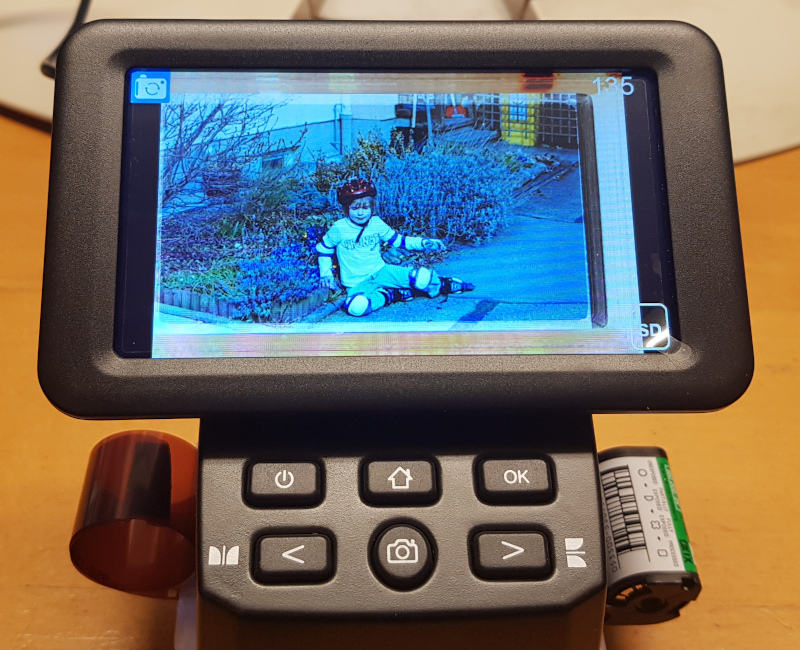
So on the screen of my scanner I now see a much better picture than with the black adapter. Scanning a film roll from APS is a matter of just a few minutes, probably it takes longer to rewind the film into the APS cartdridge (maybe I should construct a rewinding tool as well).
Post processing
Now let me see the result on the PC. This image is the same as above, but now scanned with the adapter out of transparent filament.
So all what is left to do is now batch processing the scanned images. We need to crop them and tools like digiKam offer batch processing, so cropping all images to cut away the frame area that is left from the 35mm film format is more or less automatic.
After cropping the resulting images will be around 4000×2200 pixels, thats 8.8 megapixels which should be good enough for my digital archive.
What can be improved for the next version
If you see the final scan above then there are a few things that can be made better:
- The APS picture is not really centered horzontally. That means I have to move the notch on the front side of the adapter a bit to the left.
- The APS picture area shows a sort of white frame. I guess this comes from the fact that the APS film „window“ in my adapter is small and has exact vertical walls. So for the next version I will increase the window size and learn how to do lofts in FreeCAD to make a different „picture window“.
Get it on Thingiverse
Of course I uploaded the current work to Thingiverse. I hope to have version 2 ready soon and then I will update that thing.
Unfortunately Thingiverse still has the problem that some designs don’t show up. So here is a second upload that might work better.
Pingback: Version 2 of the APS film adapter is done | König von Haunstetten